
Tools needed: adjustable wrench or 13mm spanner/box-end/socket, (Phillips-head screwdriver if unit is secured to floor brackets), wire cutters and wire strippers. Optional tools: locking-channel pliers Materials needed: Electrical tape, locking-lever connectors, or butt connectors (with Crimping tool)
- Disconnect the power and open the unit shell. Lift the fan to be replaced and cut the wires connected to that fan motor. Leave as much wire connected to the unit as possible.
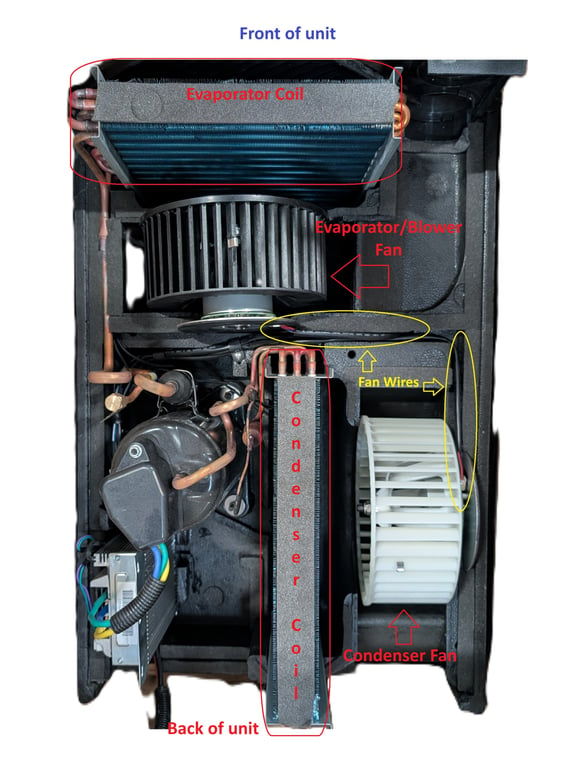
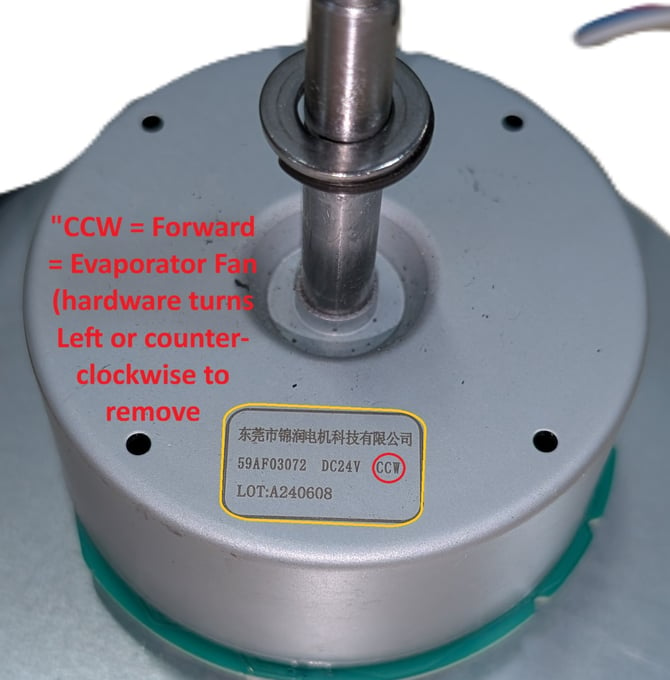
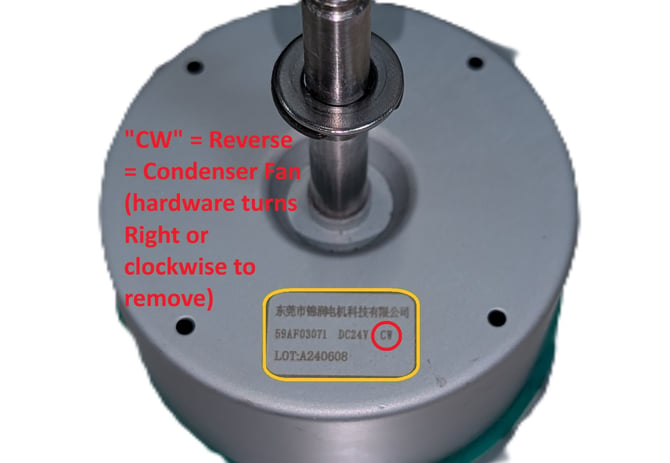
- First, check what part you're replacing. The Front fan, Evaporator, or Blower fan is labeled "CCW" and uses forward threaded hardware (Righty tighty, Lefty loosey) The Back fan or Condenser Fan is labeled "CW" and uses reverse-threaded hardware (Righty loosey, Lefty tighty). Make sure your replacement part is going in the correct place!
- The Evaporator fan will probably have a forward-threaded spindle and nut. These will be loosened by pressing the fan firmly against a flat surface and turning the nut counterclockwise. If the spindle spins rather than the nut, try using a pair of large locking-channel pliers to hold the fan motor shell still. Remove the fan blade.
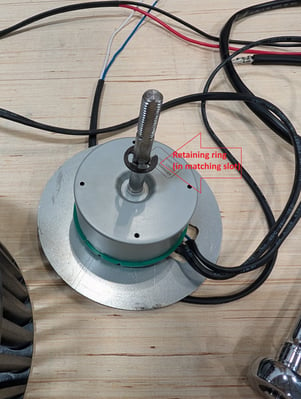
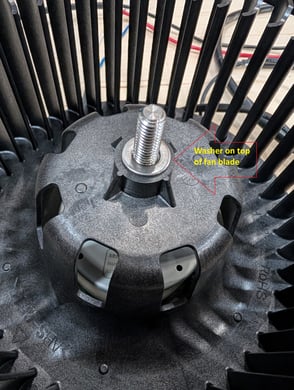
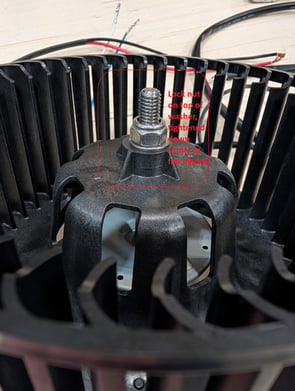
- Check that the replacement fan motor has the same label as the one being replaced. Verify that your replacement fan motor comes with a retaining ring and washer. If not, use them from the old fan motor. Carefully remove the nut and washer, and place the fan blades by lining up the semi-circle fan bearing with the motor spindle. Slide the fan blades down to the retaining ring, and place the washer on the spindle on top of the fan blades. Tighten the nut the opposite way you removed it (Righty tighty for the front/evaporator/blower fan). The fan should not have any wiggle room when you've finished.
- The Condenser fan will probably have a reverse-threaded spindle and nut. These will be loosened by pressing the fan firmly against a flat surface and turning the nut clockwise. If the spindle spins rather than the nut, try using a pair of large locking-channel pliers to hold the fan motor shell still. Remove the fan blade.
- Check that the replacement fan motor has the same label as the one being replaced. Verify that your replacement fan motor comes with a retaining ring and washer. If not, use them from the old fan motor. Carefully remove the nut and washer, and place the fan blades by lining up the semi-circle fan bearing with the motor spindle. Slide the fan blades down to the retaining ring, and place the washer on the spindle on top of the fan blades. Tighten the nut the opposite way you removed it (Lefty tighty for the back/condenser fan). The fan should not have any wiggle room when you've finished.

- Go back to the wires you cut in the shell, strip the insulation from the wire ends. Cut and strip the ends of the wires on the new fan motor. Splice the matching colors using your preferred connection method (electrical tape, locking-lever connectors, crimped connectors). Reseat the fan, spin it with your hand to verify it spins freely. Replace the shell and test the unit.